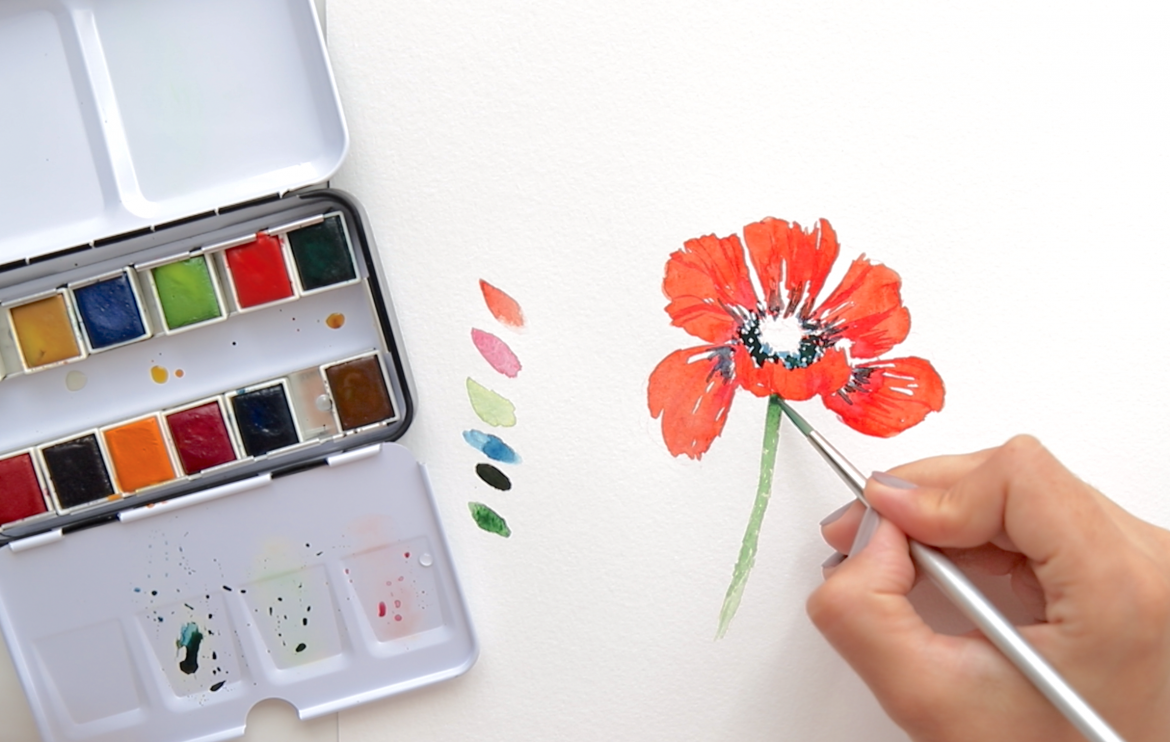
Hi friends! I have recently tried a new watercolor set my Prima Marketing, Watercolor Confections Tropicals set. And it’s absolutely gorgeous!!! you can check out my full review on my Youtube channel. The colors are vibrant and highly pigmented and mix very well with each other. And even though this set is called tropicals, all the nice reds in the set have inspired me to paint a poppy flower and I am posting a full step-by-step tutorial for it. I will attach a full video tutorial in the end too.
First of all, here is my set up and all the supplies that I used:

✧ Watercolor Confections Tropicals set
✧ Prismacolor Col-Erase Scarlet Red Pencil
✧ Princeton Brush Round Size 10
✧Silverwhite Brush Round Size 4
Now that we’re all set up, let paint!
- Sketch out the outlines.

With my red Prismacolor Col-Erase pencil I lightly sketch the outlines on the poppy flower. No details, just a few lines for my guidance. I like to use col-erase pencils because they indeed are very easy to erase and they don’t show though watercolor as much as regular graphite pencils, and if you buy a set of 24 (which is very affordable) you can match an exact color of the pencil for your illustration.
I started sketch at the center of the flower and went around adding 6 petals. My flower is slightly angled towards the viewer to see the inside of the flower, therefore the front petal is a bit foreshortened and you see only the curved top part of it. Also, I like to add variety to my petals, so some of them are hanging down.
2. Start with the base layer for petals.

For the base layer I only used the color 17, which looks a lot like cadmium red, or any vermilion, because it is very warm red and works perfectly for your poppy. I use my thicker brush, size 10, to keep the petals pretty loose and more natural looking. I started from the center and painted one petal at a time, leaving some highlight spots for a more dimensional look. Also, don’t forget to keep the outer edge of the petal somewhat uneven and looking a bit ripped for a more natural look.

3. Add a cooler red to the base of the petals.

To show that the center of the flower sits a bit deeper, you can add a subtle shadow. I used a cooler red in the set because shadows tend to be cooler in color and also I didn’t want it to be too dark, so another shade of rose red was a great way to add some variety. My petals were still a bit wet, so the rose color blended in nicely.
4. Add details to the petals.

Poppy petals are very textured and have a lot of interesting folds and creases. But there’s no need to stress over them too much. Just use the same cooler red, because it creates a nice shadow color, and with the very tip of your brush randomly add some lines going from the center out towards the edge. To add a sense of volume and dimensionality, add some curve to your lines and your petals will look like they are curving out.
5. Add a stem.

With a light green wash just add a simple stem, we will add shadows later.
6. Add details to the center of the flower.

I used a blue color number 23, which looks a lot like prussian blue and is very dark on its own, to add the anthers to the inside of the flower. With my round size 4 brush, again working with a larger than needed brush to keep my details more natural, I added loose indication of the anthers growing around the center. Simply paint some variation of thin lines and dots.

Then, using the same blue, I added a few darker lines to the base of the petals. These line are usually black in nature, but when you apply blue over a warm red they create a neutral-looking black since red has a lot of orange in it which is a complementary color of blue and we know that complementary colors mix nice neutrals when mixed.
7. Finish details on the stem.

While the center of the flower is drying, we can finish the details on the stem. With a darker green I added a shadow that is created by the petal at the top of the stem and then added some shadow on the side of the stem. Poppy stems are a bit fussy, so I scattered some dots around the stem to show a bit of texture. This green looked a little too dark, so I slightly picked it up with a paper towel because I want my main focus to be on the flower.
8. Finish the details on the flower.

Add a green pistil part that holds the seeds with the same green that you used for the stem. And then add the top star-shaped detail that covers the stigma.

And you’re done!!! That was easy !
I hope you enjoyed this tutorial and I will post a video below for your convenience just in case you want to paint along with me 😉
Thank you for checking out my tutorial!
If you’re shopping for art supplies at Blick Art Materials, please click on any Blick Graphic Ad on my website to use my affiliate link which helps me earn a small commission at no cost to you.
p.s. I use affiliate links and earn a small commission at no additional cost to you, this helps me keep this blog running and share free information with the world!


2 comments
Great article. It is very informative post. I love reading this post. It is very useful for everyone. Thanks for sharing this information with us. If anyone looking forward to buy water color paintings from online? Just visit IndianArtZone from where you get a huge range of famous paintings from Indian Artists to decor your home & office.
I’m glad you enjoyed it!