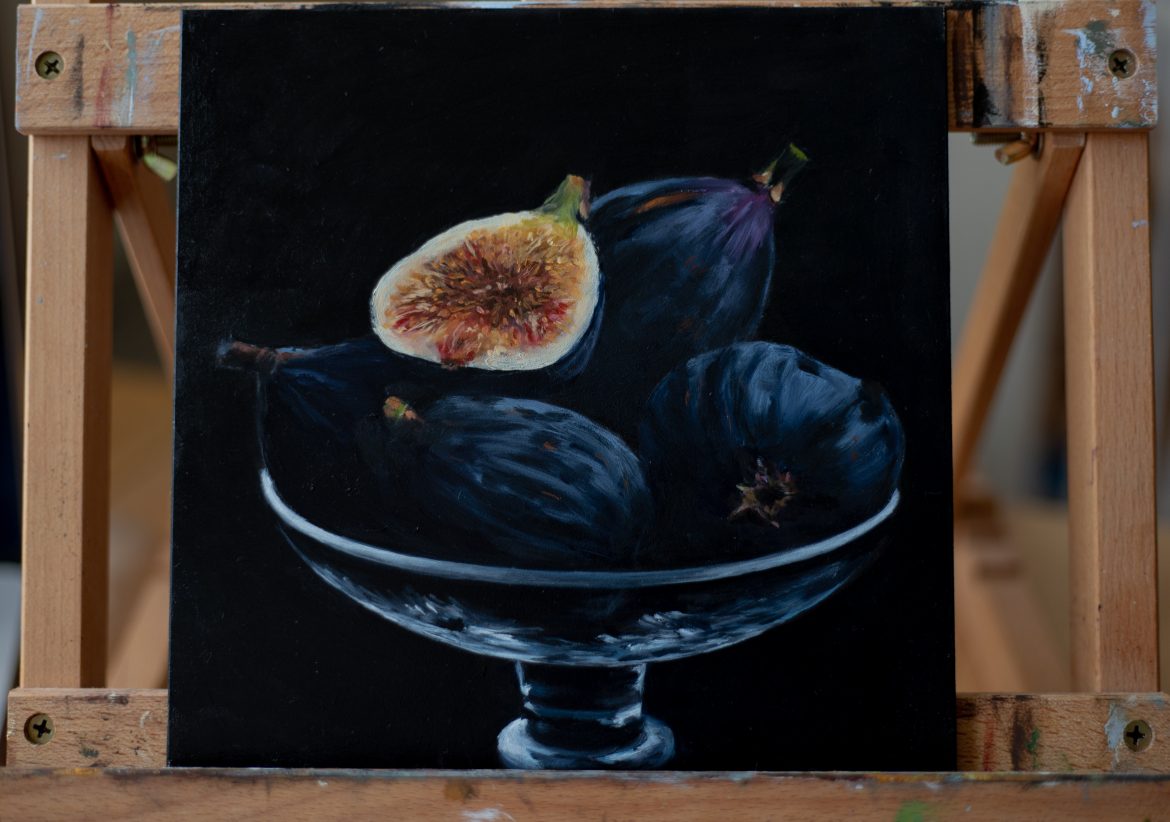
Hi guys! I finally filmed my first oil painting time-lapse! Yay! It’s much harder to film than the watercolor paintings because oil painting process can stretch over a few weeks, even if it takes about 10 hours total to paint, and therefore it is more challenging to keep the filming consistent.
This painting was done in three sitting, about 3-5 hours each. I painted from a picture because I knew I won’t be able to finish it all in one day.
First, I primed my Ampersand gessoed hardboard with black acrylic paint because it dries fast and I can start painting with oils right away. REMEMBER: oils CAN go over acrylics but NEVER the other way around. Acrylics dry in an instant and once they are dry to the touch it means they are completely dry. Oils, on the other hand, take years to dry completely. When oils are dry to the touch it doesn’t mean the drying process is complete, in reaction with oxygen oil film continues to harden and condense, therefore, when you apply acrylics over oils you create a barrier that prevents the oxygen access and it doesn’t let the oils to dry properly. After the first layers of oil paint were applied, you will see that I covered the dark background with oil paint again (mix of Paynes Grey and Raw Umber) because acrylic paint dried a bit dull and lighter than I expected, so I wanted to darken it and add that richness of depth that oil paints have.
After acrylic base layer was dry, I sketched just the outlines with white chalk pencil. I sketch with the paint directly too, but this painting is primarily dark and I needed something very seamless to sketch with.
When painting with oils on a dark background, you have to build up your layers to get richer colors or use more opaque colors . The dark blue figs look good with a semitransparent paint, it created a moody feeling when the figs disappear into the darkness of a background, but for the cut fig I had to layer paint to get a richer and more saturated color. So keep in mind that on dark canvases your colors might not look like what you used to see on a white background, but it can be easily fixed with an additional layer of paint.
As a medium I used Gamblin Galkyd Gel, which is pretty much my go-to medium for oil painting when I need it to dry the next day. This gel extends your paint and adds silky feel to it, but keeps the oil paint consistency without making it runny.
The list of oil paints I used:
- Titanium White
- Cadmium Yellow
- Yellow Ocher
- Permanent Orange
- Quinacridone Red
- Burnt Sienna
- Burnt Umber
- Raw Umber
- Sap Green
- Ultramarine Blue
- Paynes Grey
- Dioxazine Purple
You can paint it with just the primary colors, you don’t need so many shades, but for me it helps to have the most used colors already premixed in a tube. If you never tried oils before and don’t know how to pick your first paints, I have a blog post here: How To Pick Your first Oil Paints
I’m pretty happy with how it turned out. Here’s the time-lapse of the painting process:
Thanks for reading and watching! Feel free to ask any questions or leave any suggestions in the comments below! I really enjoy reading your feedback!!!
Complete list of supplies:
- Oil paints
- Gamblin Galkyd Gel Medium
- U.S Art Supply Table Easel
- Masterson Stay wet palette
- Raphael Round Brush Size 6
- Rosemary & Co Eclipse Long Filbert Size 4

If shopping for art supplies at Blick Art Materials, please click on any Blick Graphic Ad on my website to use my affiliate link which helps me earn a small commission at no cost to you
p.s. I use affiliate links and earn a small commission at no additional cost to you, this helps me keep this blog running and share free information with the world! 🙂

