No mater how good the smartphones are, nothing compares to the picture quality of a DSLR camera. But a lot of times it might seem time consuming to get picture out of the camera, upload pictures to your computer, convert to jpg (because you should always shoot raw!), transfer to your phone by uploading to cloud or emailing to yourself…. therefore many bloggers and instagramers opt out for simple phone shots even while having a good camera. I stopped using phone pictures for my instagram and blogging since I got my new Canon 6D mark II, and let me tell you that you don’t need to have a full frame camera to take pictures better than iPhone! Any camera has that softness and atmospheric quality to their pictures, ability to focus, create special lighting effects, especially considering the fact that you can use any leans you want that fit your camera and get variety of beautiful shots. My favorite lens is Canon EF 50mm f/1.8 which gives unique softness and shallow depth of field that no phone can get me.

This tutorial was made with my Canon camera and Canon Camera Connect App, but the process itself is pretty easy with any camera.
So if you have a camera that has Bluetooth (90% modern cameras do) or Wi-Fi, you have no excuse to post your phone pictures anymore. I will show you how easy it is to simply take a picture with your camera and transfer to it your phone to post it on social media and do all that in one minute.
Difference between Wi-Fi and Bluetooth connection:
Wi-Fi connection gives you control over camera, you can take pictures by using your phone as a remote, focus through your phone, etc. Bluetooth only gives you the connection to view pictures on the camera, but this connection is much easier and faster to establish and if you simply need to transfer a picture and post it somewhere, this is what you need. However, I will give you the guides for both and you can decide which one is better for you.
Step 1: Take a picture with your camera!
Step 2: Upload camera app to your phone and turn on Bluetooth!
Each camera manufacturer will have their own app, if you use Canon, you can find their Canon Camera Connect app here.
Step 3: Turn on Bluetooth and wifi on your camera!
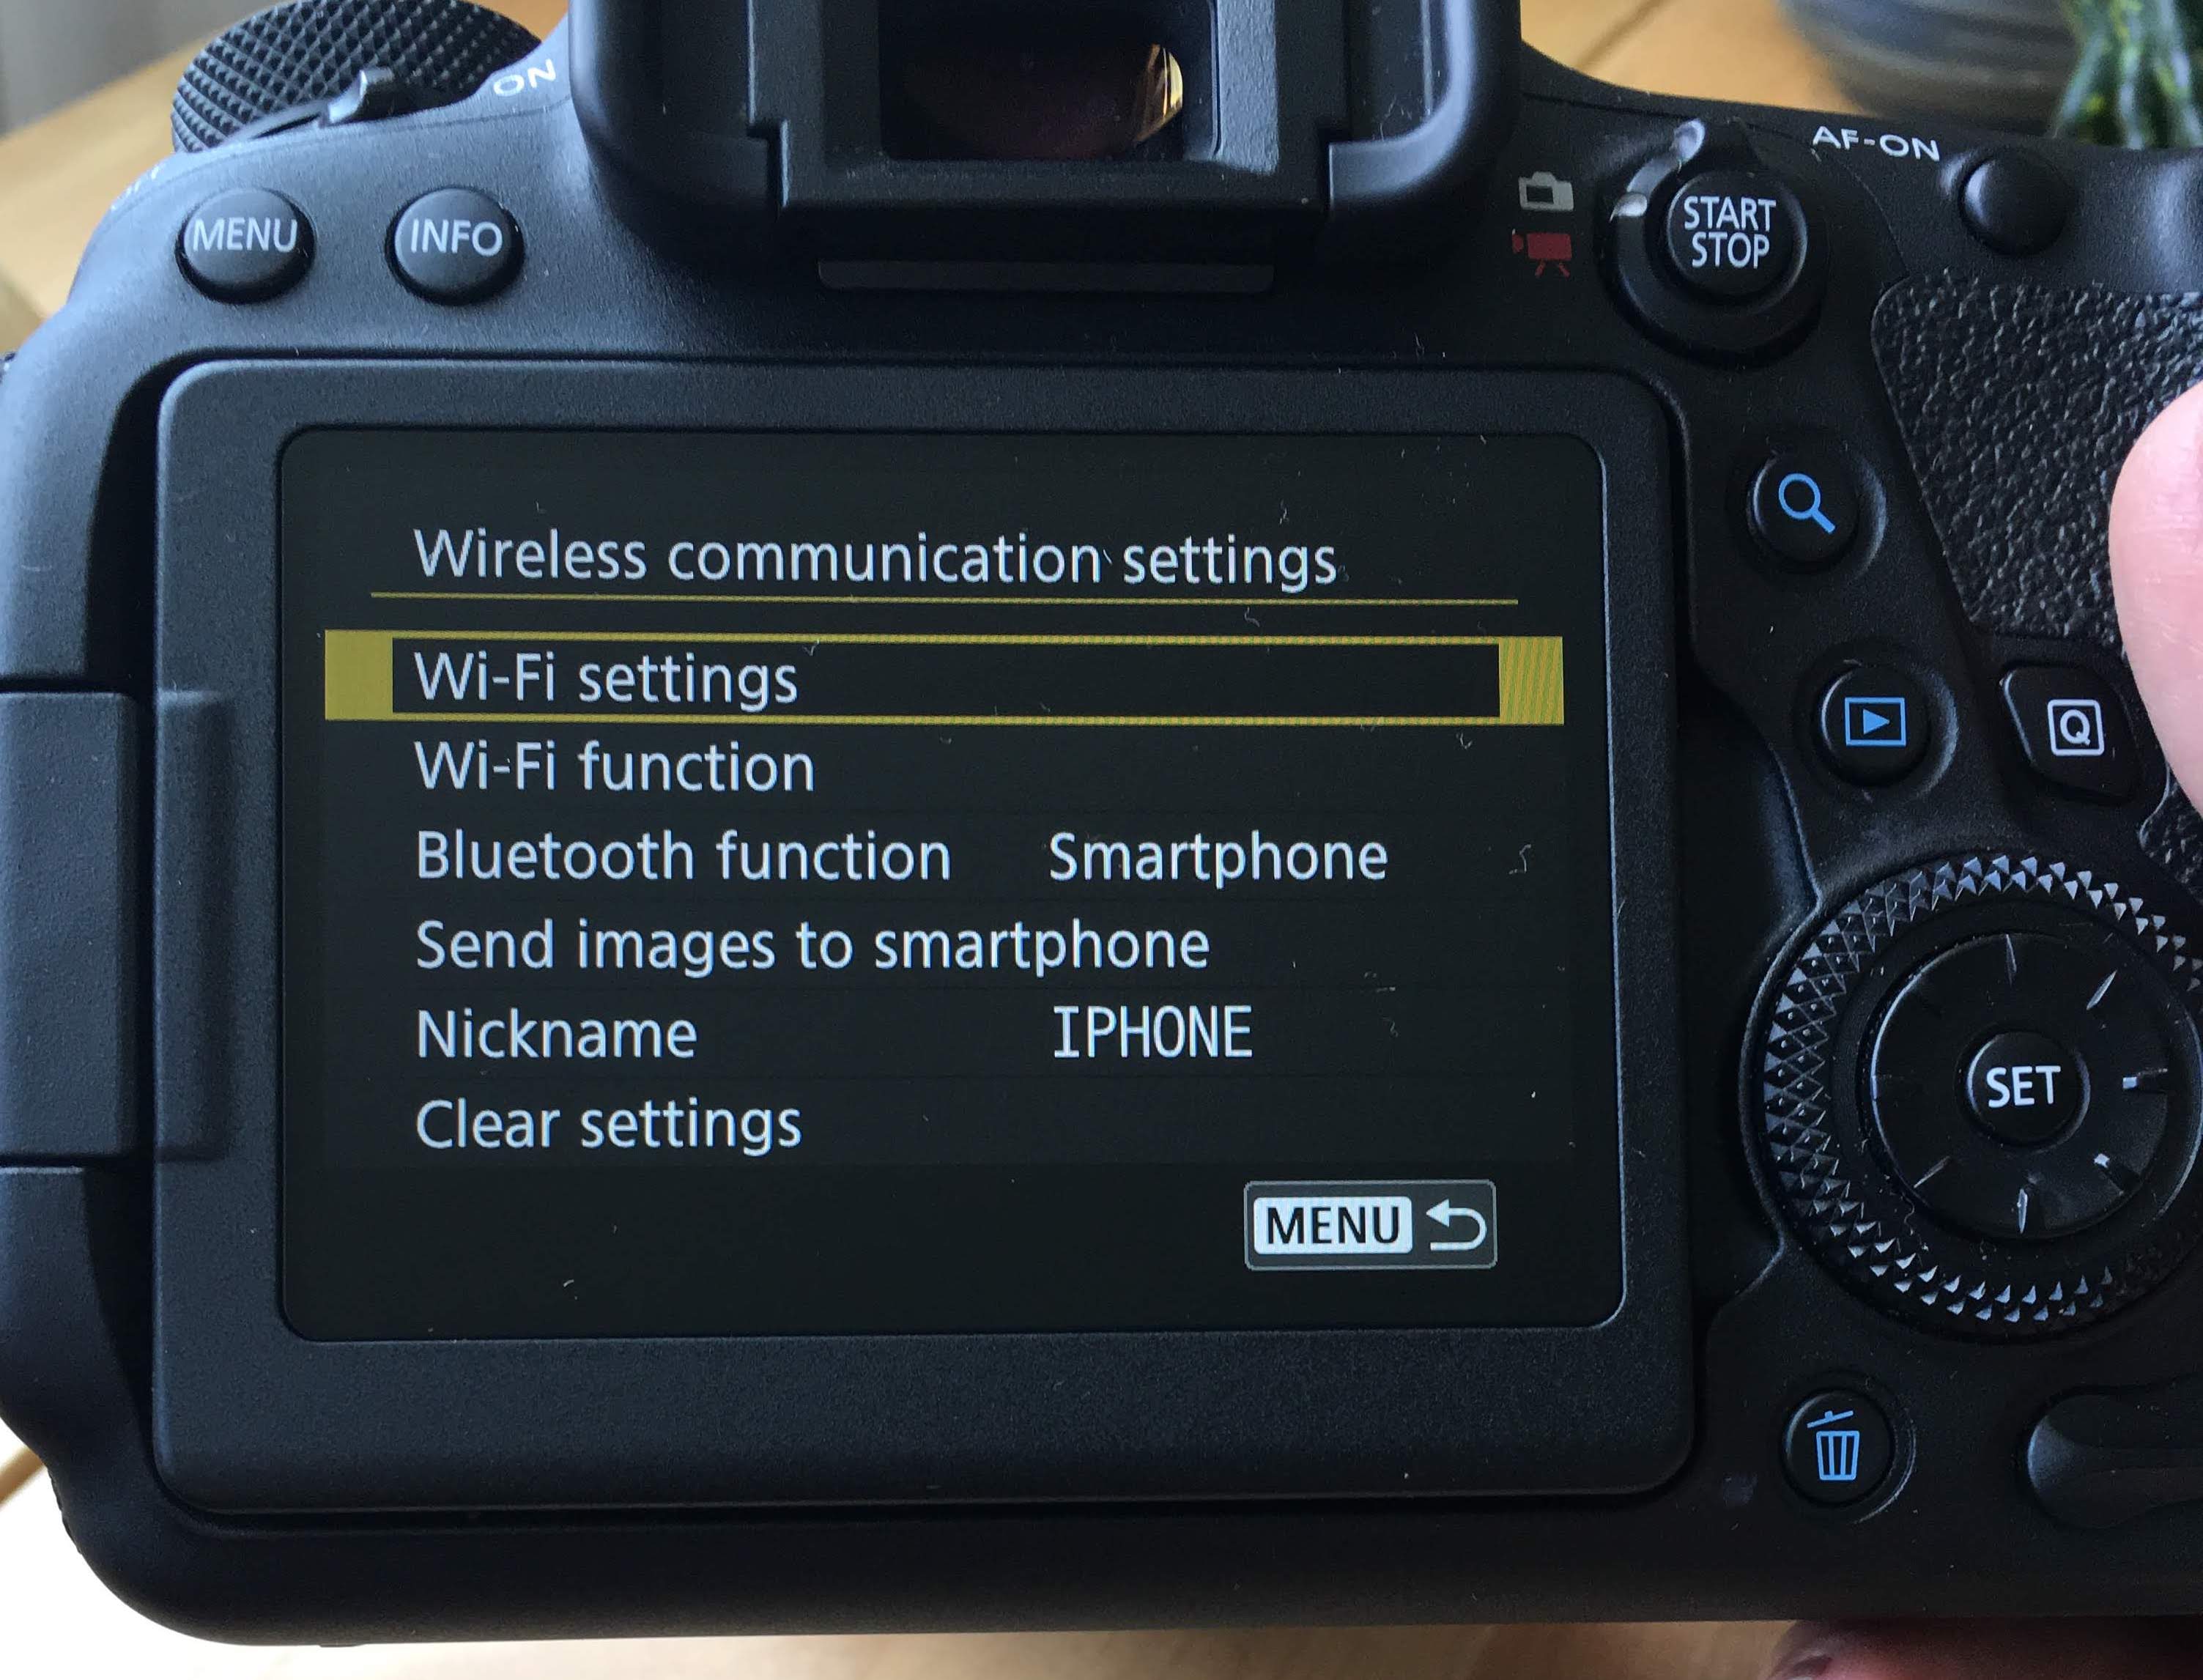
Go to menu and wireless communication settings. Click on it and pick wi-fi settings, click enable.


For Bluetooth connection:
This connection is the easiest to establish is you need just a quick transfer of a few pictures. Simply turn on the Bluetooth on your phone, and turn on the Wi-Fi in your camera. Open the Camera Connect App. Your phone will automatically pick up the camera and the Bluetooth icon will light up. Click on ‘Images on camera” and the phone will start the connection procedure.


Your phone will ask to confirm the connection to the camera.

Next you will see all of the picture that are currently on your camera even the Raw files.

Now the most exciting part is that once you select a picture and click the download icon, that picture will automatically be downloaded as jpeg so you can edit it in any editing app or post on instagram right away.

For Wi-Fi Connection:
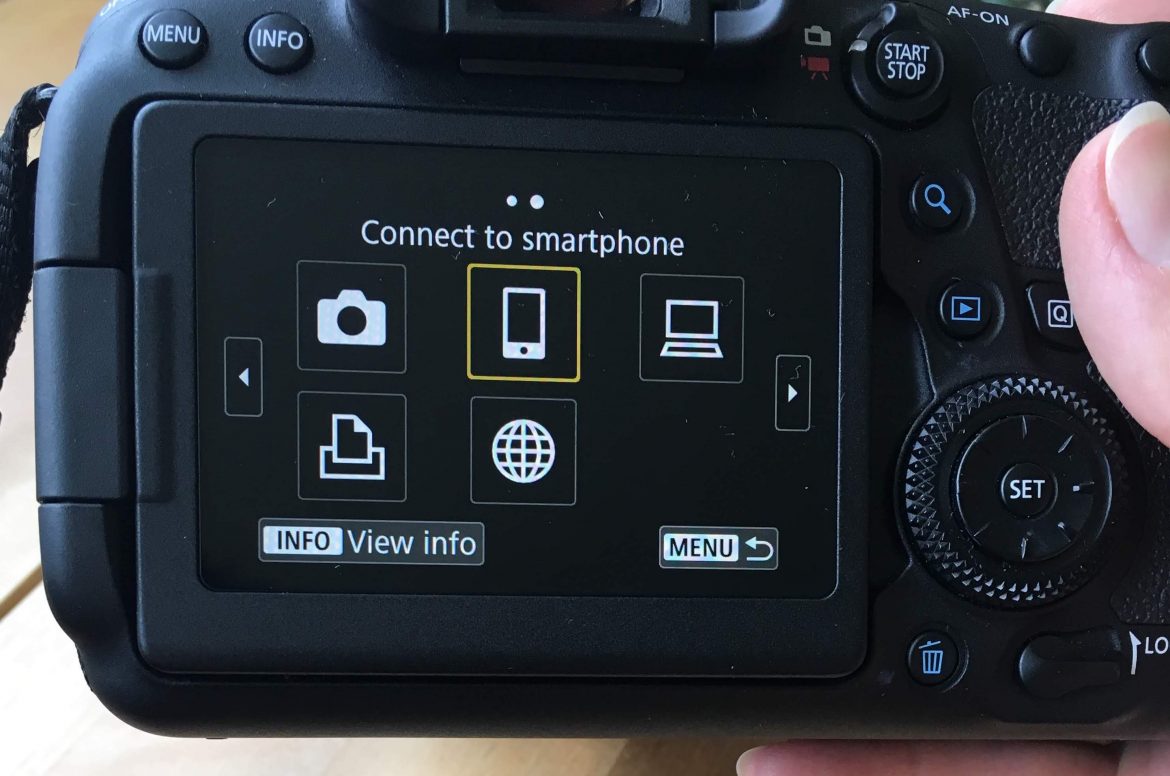
Go back to wireless communication settings and select Wi-Fi function. Pick Connect to Smartphone, it will ask you to “Register devise for connection”, click on it (once you do it the first time, you phone will be saved, just as my camera now has iPhone option on the bottom) .


You will be offered to display a QR code to find and download the Canon Camera Connect app, but you can simply click “Do not display” if you already downloaded the app in the second step.

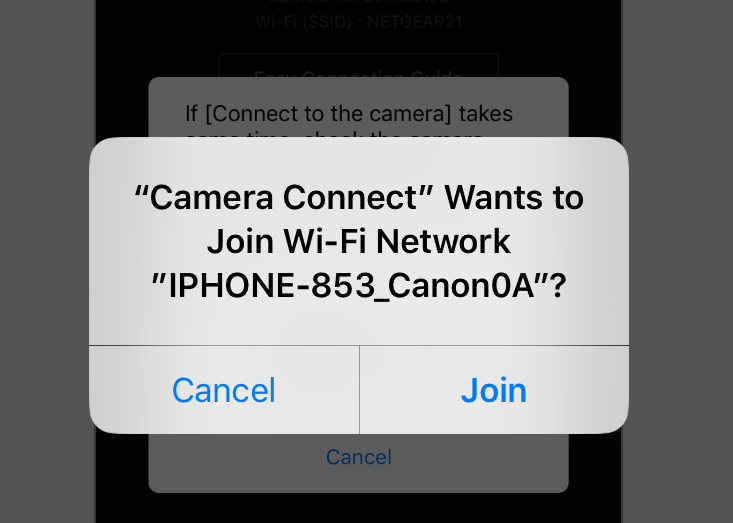
Next, you will see the SSID and password generated by camera for your phone. This creates Wi-Fi connection between camera and phone only. Go to your phone Wi-Fi settings, find the Wi-Fi name (SSID) enter password shown on camera and click “Join” .

Now open the camera app on your phone and it will say that a new camera is found. Click on the name of the camera and your camera will ask to connect to your phone click Ok on the camera. You’re done.


After you confirm the connection on both devices, you will see the Wi-Fi icon light up on the left side of the screen in your app.

You can click on ‘Images on camera” and see all the pictures you have on your camera and download the ones you want to post. That’s it. You can do this anywhere, while you’re working on a project, while traveling (so you don’t have to bring a computer with you), while at the party, etc. In other words, now you have no excuse not to post high quality pictures on your social media and treat your followers to some good inspiring content 😉


